Pages

Sunday, 20 October 2013

Tibetan steamed dumplings

Tibetan steamed dumplings
Rick Stein's India, In search Of The Perfect Curry
Recipes From My Indian Odyssey

Rick Stein's cookbooks are good value, every time. His enthusiasm for the country he is in as well as the food he discovers and recreates in the books, makes them part-fascinating travelogue along with the added bonus of tempting recipes galore.

Lucky us. We may not be able to travel to India but we surely get a taste of Rick's travels there.


Tibetan dumplings, ready for steaming (I think these somehow look like little monks all huddled together).

These dumplings were delicious. Easy as pie to make (actually easier than pie), they are really wonderful with the Tibetan chilli dipping sauce, also quick to knock up.

The dough is perfectly straight-forward and takes no longer than three minutes to make. While it rests for ten minutes, lamb mince, onion and ginger are combined in a bowl and when the dough is cut into 16 pieces and rolled out, the lamb is placed into the half-circle middle and the dough edges are pinched together, rather like ravioli.


dough is rolled out, lamb mince placed inside and made into dumplings

The only thing needed to make them divine to eat (and it was the Tibetan monks with whom Rick ate these) was a quick and fiery Tibetan dipping sauce made using chillies, garlic, rice wine-vinegar and oil. You can see it on the right, above.

Unfortunately, these dumplings are rather like making pancakes ... make sure you don't tell anyone you're making them until you've finished cooking. Like making pancakes, you might find they get eaten as soon as you lift them out of the pan, which means you can't make them fast enough to sit down and enjoy them with everyone else!

Tibetan steamed dumplings
Rick Stein's India, In Search of the Perfect Curry, Recipes from my Indian Odyssey
Rick Stein, BBC Books, an imprint of Ebury Publishing, Random House Group, 2013

Saturday, 27 July 2013

Scones

This month's Daring Bakers' challenge was to re-make or make-anew a recipe from one of the many previous challenges. I chose the scones from January 2012, never having made them for a Daring  challenge before.

A deceptively simple recipe, scones do not always readily come out as the light and fluffy versions that I remember my grandmothers and mother used to make. And each batch I've ever made seems to be a bit different.

Plain flour, baking powder, salt, cold butter and cold milk are mixed lightly together to meld into a dough. The least amount of mixing and handling with your hands, the better.

The dough is gently patted out flat so that the scone cutter can be used to make clean-edged scone shapes which helps them rise.

These are put onto a well greased baking sheet or parchment paper and cooked for 20 minutes or until golden.

hot out of the oven ...

The best part is breaking apart the warm, steaming scones and then covering the with lashings of cream and sweet strawberry jam - the simplest yet most elegant of accompaniments. 

And of course, a scone without a proper cup of tea is not a proper scone!

To be eaten smothered in jam and cream 

Thursday, 4 July 2013

Henley Royal Regatta picnic


deck chairs ready for spectators, right on the river

Henley Royal Regatta. This 5-day rowing event has been held annually since 1839 and for those unaware of Henley, you might think it is just another rowing day on an expanse of river with home crews competing against each other, but it is not. This very special rowing event draws crews from around the world who look forward to meeting old international rivals, in a very traditional English setting, at the very traditional time of the English summer. It is rather like going to Wimbledon, and attracts not only the competitors and lovers of the sport but also people who come purely to take part in something very English. Dress code for the Stewards' Enclosure is strict - ladies must wear dresses/skirts below the knee (absolutely no trousers allowed) and men must wear suitable jacket and tie.

the last few metres of the 2-mile course.
scoring notification - how it has always been done
 
Henley is the only regatta which operates a two-lane knock out draw, racing in heats. Only two crews row at any one time as the width of the Thames is narrow here but what it lacks in width is made up for in length. The Thames is the longest river entirely in England with a total length of 215 miles (346 km). At Henley, it is the only natural 2-mile straight stretch of the river's entire course. The rowing course is actually 112 metres longer than the standard international course of 2000 metres, but that doesn't matter. HRR has its own rules, and is not governed by international standards, but is still recognised by both the British and International Rowing federations. There are 20 events covering 6 classes of race from single sculls to eights.

For rowers Henley is prestigious. For non-rowers, it's a great day out to pose in one's regatta finery.

A lot of women look like they're at Ascot, but I thought this woman looked beautiful.


But to food lovers, Henley is all about The Picnic.

After the morning racing, (and if you are not lunching here):


you can go back to your Rolls or classic vintage car where you have parked nearby in grassy car parks. There's plenty of room between the rows of cars to allow for owners to spread out picnic tables, umbrellas, chairs and in some cases, candelabras (!) and table settings to enjoy luncheon from 12.30pm - 2.00pm, at which time all races are suspended. Pimm's is the drink of the day and delicious food is always expected.

(notice the Veuve Clicquot)

So today with our Bollinger and Pimm's we had smoked salmon sandwiches, ham & grain mustard sandwiches, quiche, rocket salad, chipolatas, humus, breadsticks, vegetables and to finish strawberries, cream. For afternoon tea we had fruit cake with a cup of tea.

To me, Henley is all about the picnic.

Saturday, 25 May 2013

cheesecake

family recipe

So I decided to make a cheesecake. And it turned out like this:


When you have a favourite recipe, nothing else will do. In this particular case, my Dad's is the best I know. The ingredients are these:
crushed Nice biscuits with melted butter
 
First off, you must prepare the biscuit base. This is the most tedious part but once it is done, the rest is quick and simple. Leave the butter to melt whilst crushing the biscuits by placing them inside a plastic bag then bash with a wooden rolling pin (quite therapeutic).
 
Place the biscuits into a bowl and add the melted butter and mix thoroughly.
 
Line a spring form tin with the mixture, first using a spoon to spread and then a flat-bottomed glass to help the mixture firm up. The straight sides of the glass help especially when forming up the sides of the tin. This can be a pain if you're in a hurry - so don't make it if you're in a hurry! This is also quite therapeutic
 
 
These are the other ingredients:
Philadelphia cream cheese, sugar, eggs, lemon juice and vanilla extract

The Philadelphia (full-fat) cream cheese and sugar are beaten with 3 eggs, some vanilla and lemon juice.
 
 
Then pour into your prepared biscuit base:
 
 
smooth out:
 
 
then bake, 180 deg C (350 deg F) for 30-40 minutes, depending on your oven. Mine took 35.
 
And, here it is. 
 
Leaving it to cool at around midnight, I went out to get my daughter who had been babysitting. Of course, we came home to smells of freshly baked cheesecake were too irresistible, and against all my protestations, a hungry babysitter could not resist a small slice before it had even cooled properly.
 
Nevertheless, here it is this morning, having been refrigerated overnight. And it tastes great fridge cold.


Doesn't it look good? It was!


Saturday, 4 May 2013

semi-sourdough


semi-sourdough
Bourke Street Bakery
Paul Allam & David McGuinness


semi-sourdough, with brown flour
Today I made a semi-sourdough bread. It has a light sourdough flavour but it does not need the overnight retarding because yeast is added. The recipe for this loaf says white, but I had no white flour left so I just used brown flour, and it worked really well which makes this basic recipe very versatile.

white starter
 
To 540g of white starter, 680g of brown plain flour was added, along with 5g of dry yeast, 275ml water and 12g of sea salt. These were combined slowly for about 4 minutes and then on a higher speed for about 5 minutes.

The resulting dough was smooth and elastic, and left to prove, covered with plastic:

Dough ready for covering with film and proving for one hour.
 
Here's what it looked like after one hour:


It was then knocked back:


and left to proved, covered with plastic, for another hour.

The dough was then ready to be divided into 3 x 500g balls, then rested for 20 mins.

I didn't have the required small loaf tins, so I just used my ordinary enamel dishes, and they worked well. I only had two so had one loaf left over which I put into my normal loaf tin.


Then these were put into the fridge for one hour. The loaves were removed from the fridge and left for a further 1.5 hours until each loaf had grown in size by two-thirds. In the meantime, the oven was turned on to 200 deg C.


The loaves were put into the oven, spraying it with water before closing the door.
After 20 mins, the loaves were turned around in the oven and then baked for a further 10 minutes.

Here they are, straight out of the oven. I haven't noticed this with other loaves, but the crust continued to make cracking sound for about five minutes after they came out of the oven. Is this the normal result of a good crust, I wonder?

PS 17/10/13:
Baking from this book is a dream. I go back to it time and time again, and this loaf has become our everyday loaf. I now use most of the dough for a larger loaf, for the above dark tin, and the rest I make into a baguette and generally freeze it soon after it has cooled. I now have a stack in the freezer and it is wonderful for pulling out on the weekends for lunch.

If you can afford it, buy this book. I doubt you will need another.


I was really pleased with this loaf. It was lighter than the sourdough loaf, but retained the chewy crust. I am especially pleased with the substitute brown flour instead of white. I really had a lovely flavour.

brown semi-sourdough, very light and delicious nutty flavour
 

Thursday, 2 May 2013

friands

almond friands
Australian Women's Weekly, Cakes and cupcakes


I haven't made these delicious little cakes in a good, long while and I only first made them a couple of years ago when I saw a recipe in The Australian Women's Weekly Cookbook of Cupcakes and Baking, although they've been around for at least ten years in Aus. They're so quick and easy to make.


The friand is a very popular little cake in Aussie cafes but is not known very well on these shores. I worked in a bakery not so long ago, and when I asked, they had never heard of them. Mind you, this bakery was not very adventurous. Although they made truly wonderful artisanal bread and pastries and cakes (all hand made), there was never anything new. They made great bread including sourdough, rye and spelt but wouldn't go near gluten-free. Clearly this is an issue these days and the number of people who, either in the bakery shop or out at a farmers' markets, would ask for gluten-free bread happened every shift I worked on. Why wouldn't you seize these enquiries as a reason for a new product? Why wouldn't you want to cater for what your customers asked for?

This is something which I cannot fathom. If you are in business then surely, it is to make money? You would naturally (I would have thought) adapt to your customers' needs, keep your customers interested with new items whilst retaining those items in demand for which you had built up your reputation, thereby keeping everything new and interesting so people would keep coming back. This bakery never made any new products, never advertised (how is that possible in this day and age?) and kept to within the confines of 'we've always done it this way' which is good, but extremely limiting. It was obvious how successful they could become: they were exactly 'on trend', adhering to their 30-yr history, were proponents of the Real Bread movement, and it was patently obvious they should have capitalised on who they were. They were unique and had provenance! Instead, although outwardly an established 'brand' locally which was very Country Living magazine (and we are in the country here), I fear it was either arrogance or short-sightedness which seemed to keep them from moving on.

Which is what I should do. Where was I? Ah yes. The friand. (Blogger keeps changing it to friend).

I think friands are a derivation of the financier which is a little French cake, once-up-a-time made in little bar shapes, no unlike gold bars and thereby associated with finance, hence Financiers. How they made it to Australia and became friands I don't know. Perhaps that is the way of Australian food: it has come from somewhere else, been adapted and then made to reflect the Aussie lifestyle and climate, becoming something it was originally not, and then they make it their own.


As I said, this recipe comes from The Australian Women's Weekly Cookbook of Cupcakes and Baking, purchased here in the UK about three years ago as an excuse to buy what I thought was an essential reference for my wish to baking for a living.

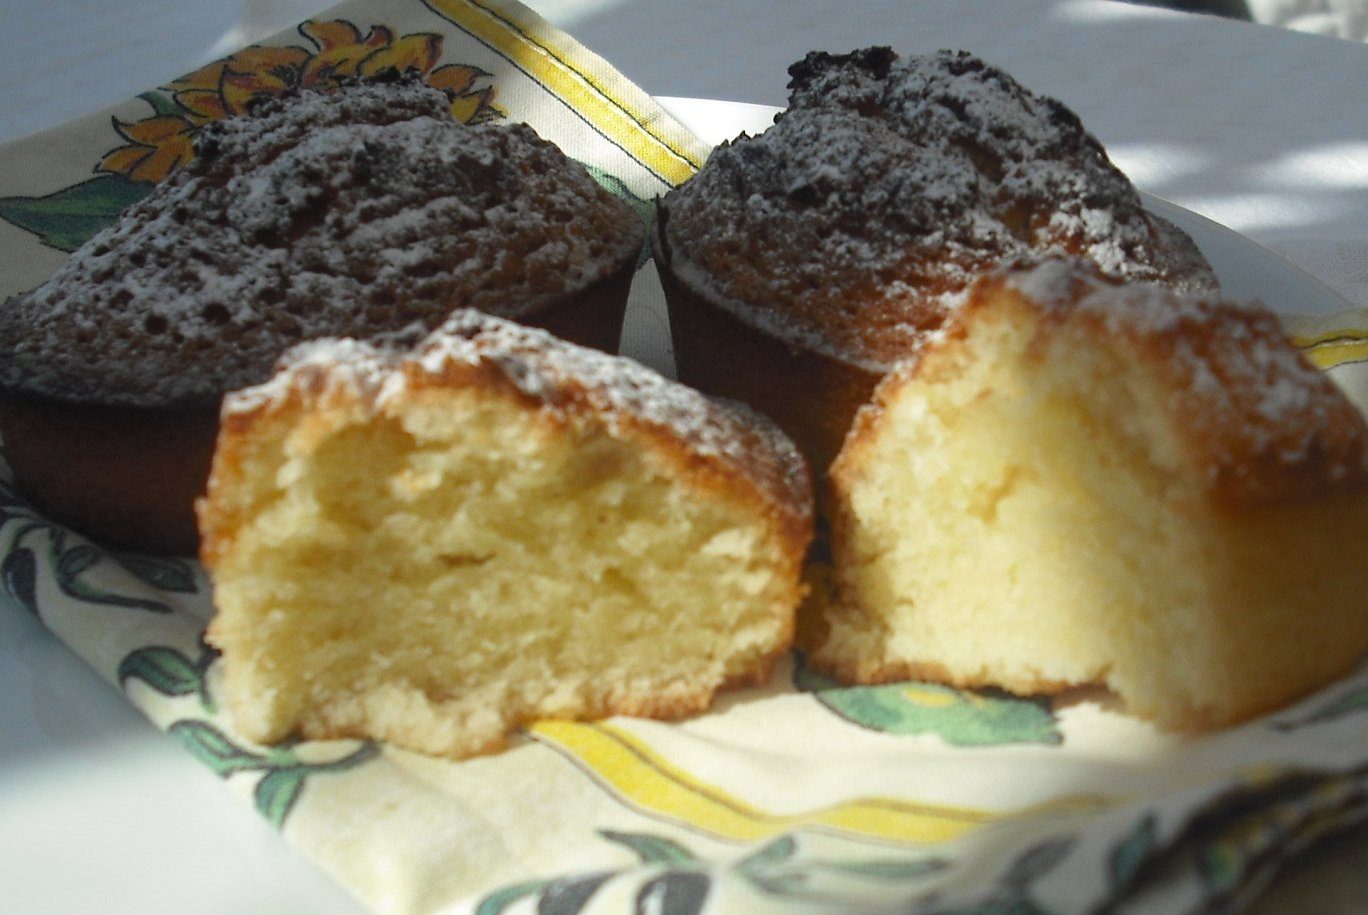
The recipe requires egg whites, sugar, ground almonds and a little flour. Using egg whites, gently beat for a minute. Add them to the rest of the ingredients and combine carefully. And that is literally it.

As an introduction to those unfamiliar with friands, these ones are the basic almond friand. It is my intention to later explore more flavours with this versatile little cake.


So, what you need first off is a friand tin or silicon pan. The Aussie friands traditionally have an oval shape and when I went to shop for the pans, I never found them because, remember, friands are not popular here so I found a silicon one on the Internet. I don't really like baking with silicon as I prefer a strong tin when I turn them out onto the wire rack when they're still hot from the oven. Silicon is very wobbly. I'm not comfortable with wobbly.

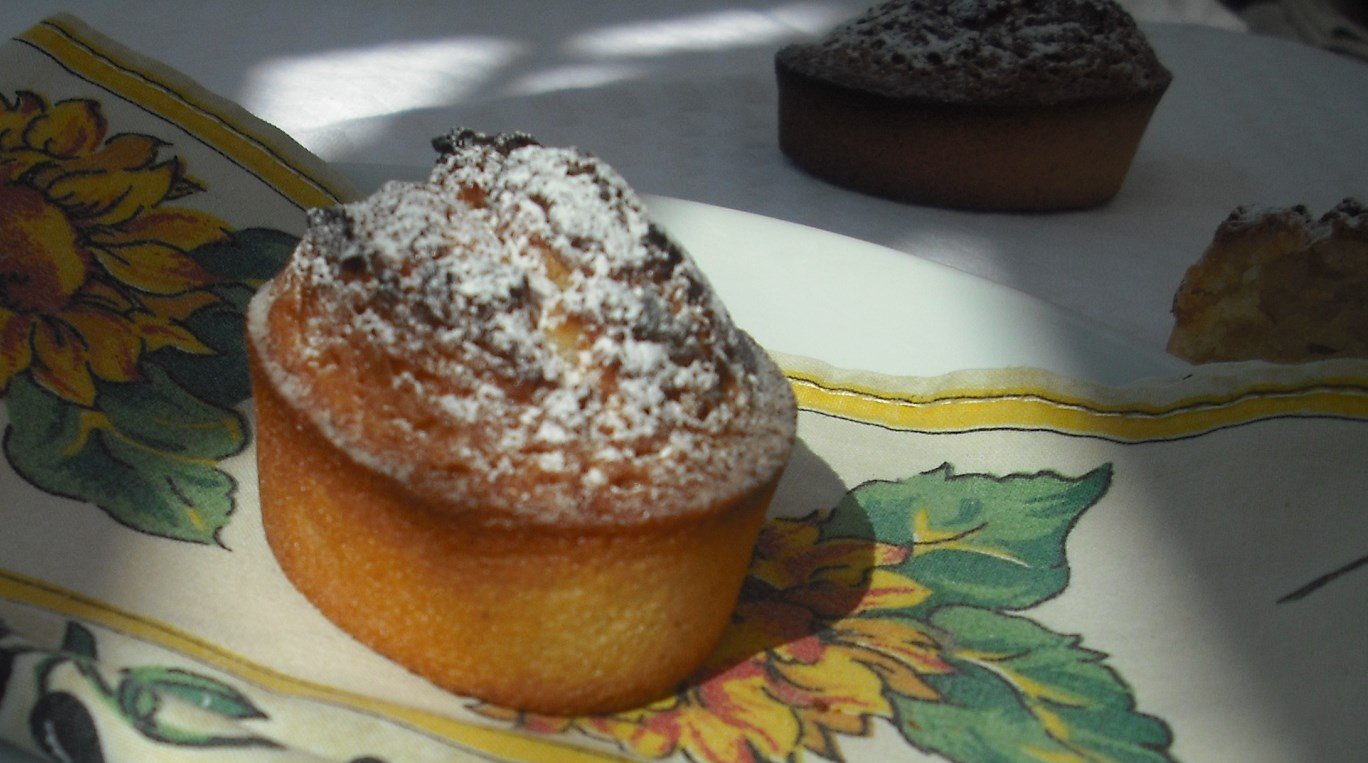
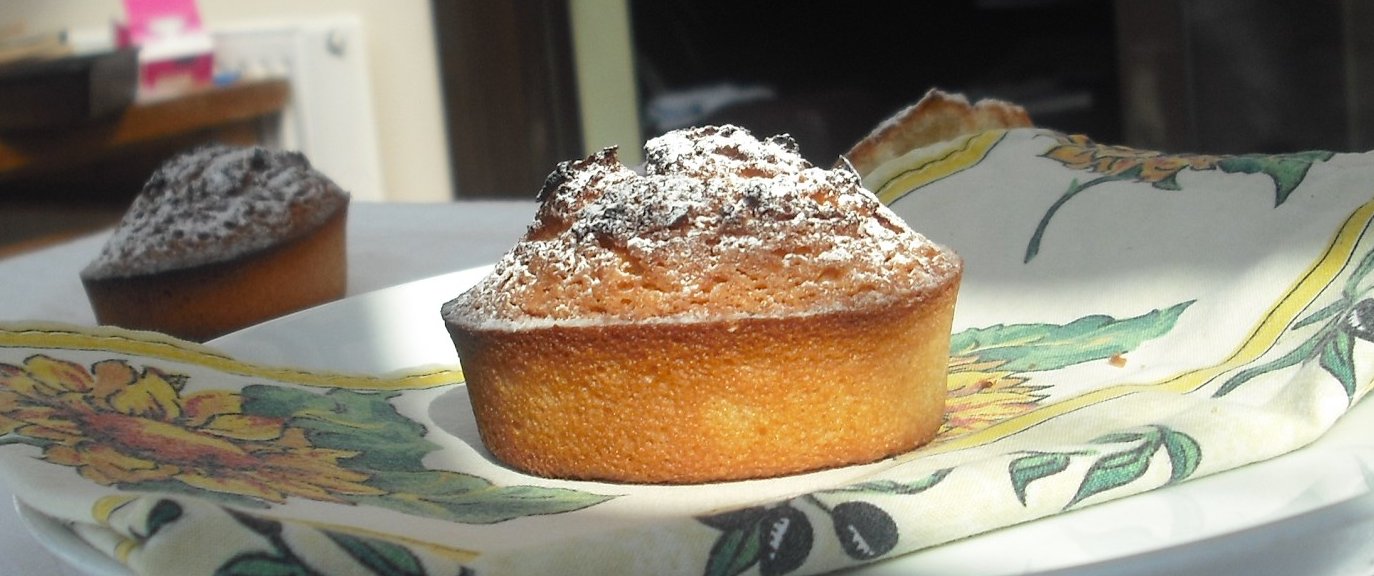
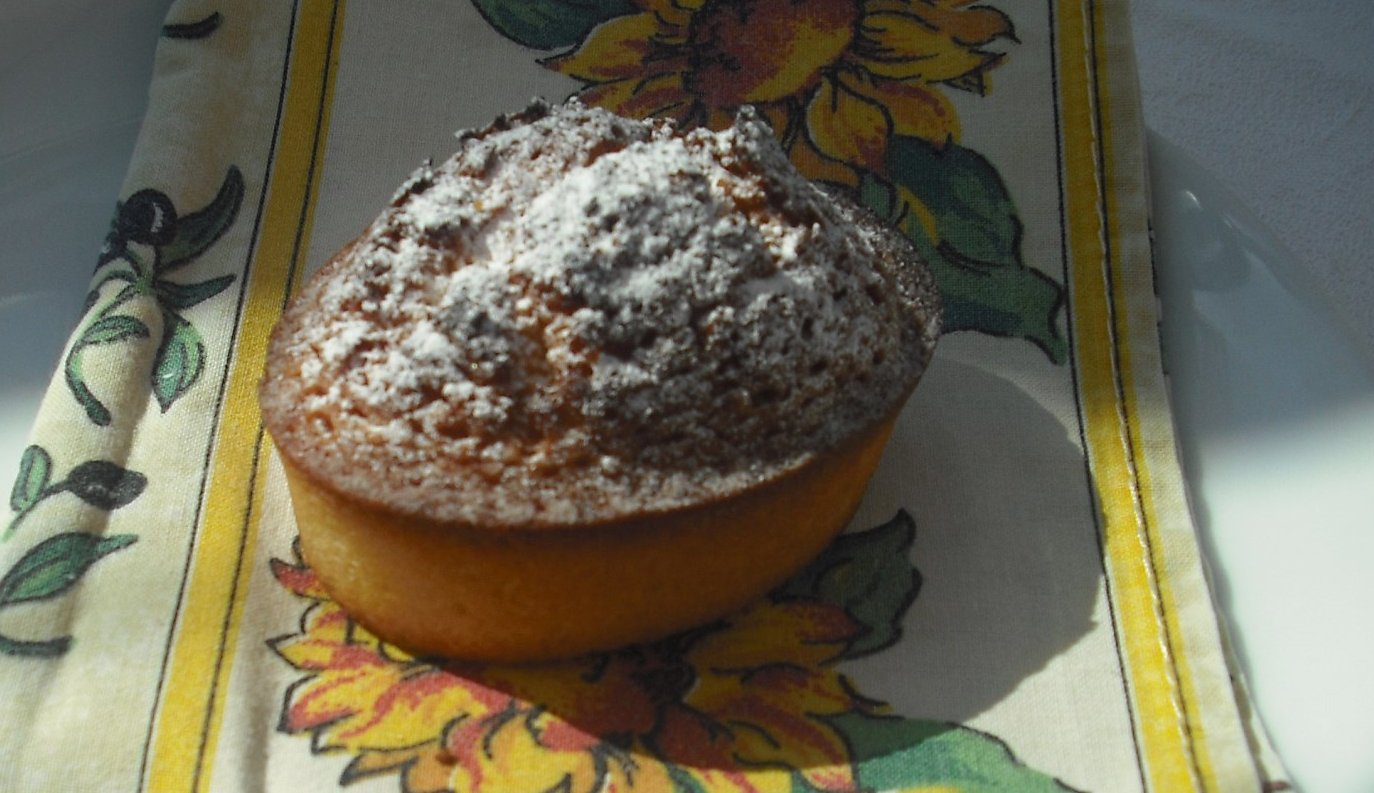
A dusting of icing sugar is all that is usually done to finish them off .


They are a dense, but very light moist cake and are real keepers. They last in the tin for a week.
Perfect with a cup of tea. Or even morning coffee. Or late night indulgence when no one's looking ...
Think I'll go and have another one now.

The Australian Women's Weekly Cupcakes and baking


Friday, 19 April 2013

marmalade

cooking secret no. 1

I know it's not exactly marmalade making season, and I know this is not the way devoted marmalade makers make marmalade. I would be a devoted marmalade maker, had I a tree and copious amounts of oranges( as I did in another life) but I live in England, and I simply don't want to buy them. Having said that, I just wanted to share with you how I can still get my marmalade making fix.

I once bought what I thought was a large can of orange marmalade, but when I opened the tin at home I found that I had actually bought a can of orange pulp used to make the marmalade. So I did and now I never buy marmalade from a shop. And that is how I have come to be making my own marmalade ever since - from a tin! So this is how I make it. It's terribly simple. You take one can,


and then open it:

the hardest part - opening the can

Then you pour the contents into a large saucepan and add three quarters of a pint of water (which is conveniently measured on the inside of the can) and add, wait for it, 1.8kg of sugar. That's an awful lot of sugar! But I make it with 1.5kg sugar - I prefer a less sweet marmalade. I even kid myself it's healthier.


sugar dissolving in 3/4 pint water with orange pulp

Anyway, pour the 1.5kg of sugar into the same pan and then proceed to heat until it is boiling.


(As you can see, I added a lemon whilst it boiled, for added pectin, I think, and a little tartness.)

Once boiled (and don't walk away from it because it will do what it did to me and boil right up and over the pot),
simmering marmalade
turn the heat down and simmer for another 15 minutes or until the jam 'wrinkles'. This happens when a spoonful is placed onto a saucer and let to sit for 2 minutes, and then a spoon is dragged through the middle of the pool of hot jam. If it wrinkles, then it is ready.

Leave for a couple of minutes, then pour into the prepared jars. In my case, I collect screw-top jars and first wash and then pour boiling water into them until ready to fill. This sterilises the jars.

Et voila. Six jars of home-made marmalade, without the fuss of cutting up all those oranges. Genius.


We love this marmalade, and prefer it to shop bought! And it's cheap. Each jar comes to about 30 pence, which ain't much at all.

Saturday, 6 April 2013

olive oil bread

olive oil bread
Bourke Street Bakery
Paul Allam & David McGuiness


It's the weekend and that means more time for slow bread baking. Today I baked olive oil bread, as well as more sourdough. I wanted to have the bread ready for some warming soup because we are still in the grips of Winter here with temperatures not rising above 4-8 degrees C this week. Where's Spring? To be fair, it is a sunny day and it has amazingly lasted ALL day!

Anyhow, this olive oil dough was easy peasy to make. All ingredients went into the mixing bowl - the only difference in this dough to a usual dough was the addition of a little olive oil and milk - mixed very well for about 6 minutes. The result was a smooth, elastic dough:


Then it needed 1.5hrs of proving, with two knock backs at each half hour. After the second proving the dough looked like this:


After 1.5hrs the dough was divided into two pieces, each weighing 500g. The leftover 35g or so was put in a lidded plastic box and into the fridge until next use when it will be used as a 'ferment'.


These were covered loosely in cling film and after an hour they had doubled in size, until I tried to take the cling film off and mistake number one happened: I didn't flour the loaves beforehand and the plastic stuck so bad to the dough I had to tear it off, thus deflating my beautifully risen loaves:


Wah! So I floured them liberally and upended a large baking dish over them and let them rise a bit more:


Then it was into the oven for 20 minutes at 200 deg C.

And this is how they came out:


The smell was great. You could really smell the extra virgin olive oil.


Once cut, the crumb was lovely and open and the texture was crisp base and crust and soft and light crumb.


verdict: a definite 'thumbs up' with this bread. It was super easy to bake and I'm sure would have looked even better had I not stuffed up the plastic covering stage, ie not flouring the dough on top before covering with cling. But everyone loved this bread and I will definitely be baking it on a regular basis.
 
who can bake this? I would have to say that even someone who hasn't baked bread before can bake this loaf. It doesn't require any tricks or long proving. Well, I don't think it is long proving; others may disagree but all up it took no more than two hours from start to finish.
 
A great loaf, especially with good olive oil to dip into.
 
olive oil bread
bourke street bakery, Paul Allam & David McGuinness

Saturday, 16 March 2013

chocolate coconut squares

Clarissa's Comfort Food
Clarissa Dickson-Wright

This is the sort of old-fashioned treat which is so easy, it belies the deliciousness of it. And it doesn't even need baking! Just pop it in the fridge for 30 minutes ... ready in no time at all.

Butter, chocolate and sugar are melted over a low heat. Then an egg is whisked in, adding coconut and crushed biscuits, mixing thoroughly.


The mixture is poured into a shallow tin (mine was a bit too shallow) pressed out flat and placed in the fridge for about 30 minutes.

The icing is made with icing sugar, butter and cream.

and then spread onto the chocolate base, and sprinkled with extra coconut.


Another half an hour in the fridge then it's ready to cut.


Sweet, crunchy, chocolate and coconut with vanilla icing.


Verdict: Excellent. Biting through the creamy sweet icing, the lovely vanilla & coconut flavours  mix with the crunch of the coconut and chocolate base. As there is no flour, the chocolate is rich but broken up by the plain biscuits so it is not sickly. The recipe calls for Digestive biscuits but I made them today with plain old Rich Tea biscuits (Maries) and I liked them better than the digestives. The less buttery biscuit counter-balanced the richness of the chocolate.

This is one of those recipes that a beginner can easily attempt, be they a small person so young they need to stand on a stool, or someone to whom you could introduce baking (like your errant teenager). Either way, it is a quick recipe to master (great for low attention spans) even on the first attempt. Could easily become a well-loved family fave as well.

As far as the book is concerned, Clarissa Dickson Wright is a proper food lover, who cares deeply about the food and not a jot for celebrity. She would probably hate the idea of being called a 'celeb'. If you've never heard of her (where have you been?) look her up. She may not be your average 20-something starlet, but she's way ahead in her breadth of food knowledge and head and shoulders above all those mediocre, instant TV chefs. All her recipes are simply written and easy to follow. And the photographs are beautifully un-arty, if you know what I mean. Like Clarissa herself, what you see is exactly what you get.

(I will make more new recipes at a later date, but one which I have made at least a dozen times is her Beef Stew. It's fantastically warm and comforting, topped off with the fluffiest dumplings ever. Who doesn't like dumplings?).

Who can make this? little kids, big kids, people with no time. Great for picnics.

Clarissa's Comfort Food, Clarissa Dickson Wright, Kyle Cathie Limited, London, 2008